🎯 Pro Photoshop Techniques Mastered in HCIE: The Complete Guide
Professional digital imaging workflows rely on a proven set of time-saving secrets, color grading formulas, high-end skin retouching techniques, and precision masking. When switching to modern cross-platform software or optimizing existing workflows, understanding how these industry-standard tricks translate under the hood is essential.
In this comprehensive tutorial guide, we break down essential Photoshop techniques and demonstrate exactly how to execute them inside HCIE (High-Performance Cross-Platform Image Editor). Every single technique below features an in-depth breakdown: why the technique is used, the exact Photoshop step-by-step execution, the direct HCIE menu paths and shortcuts, and pro tips for achieving deterministic, pixel-perfect results.
🖥️ HCIE Workspace & High-Performance Architecture
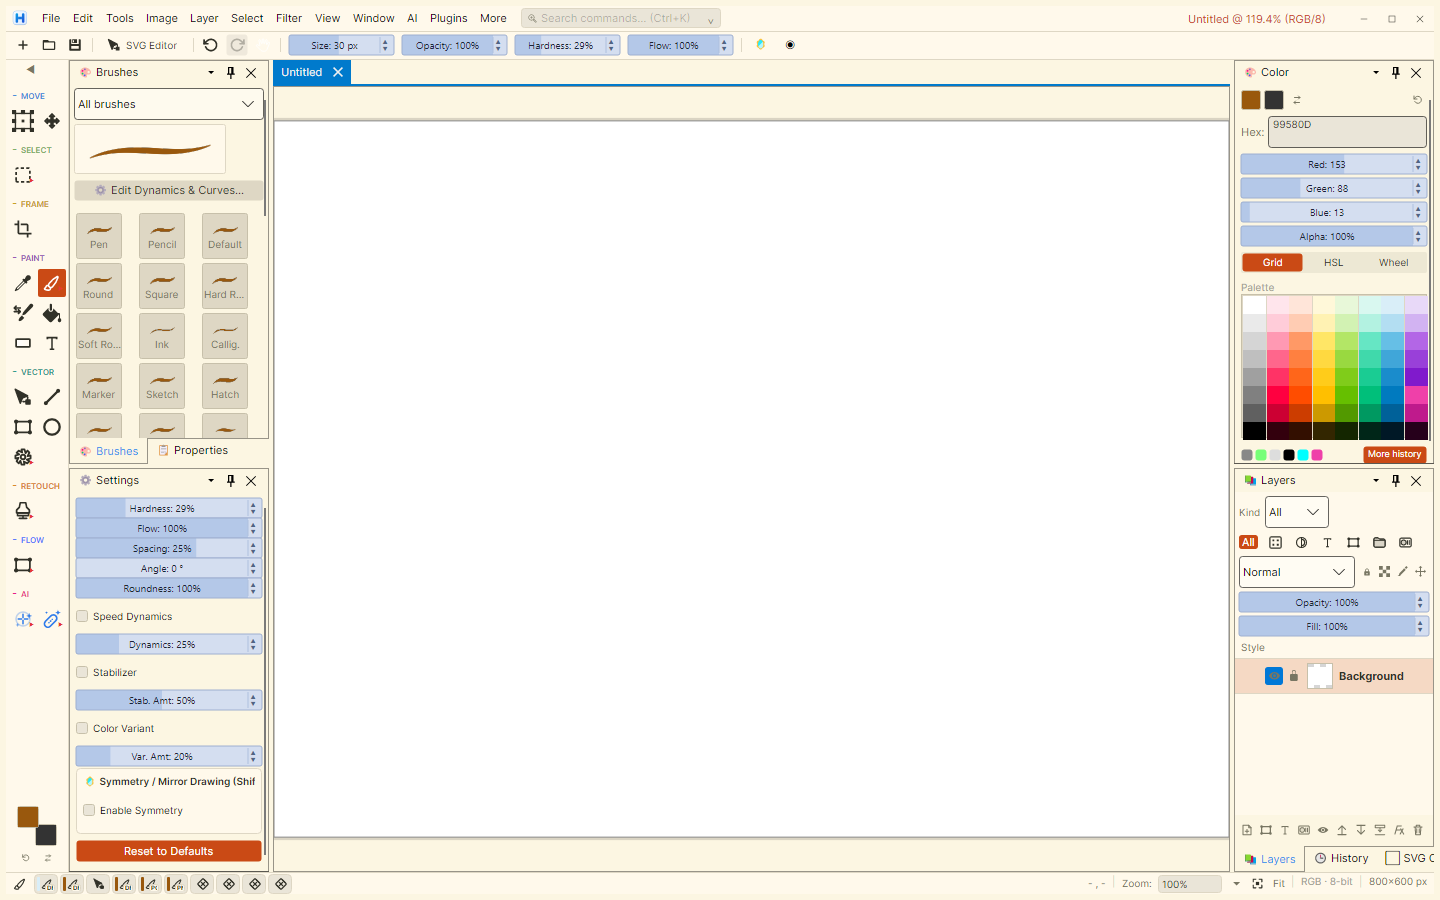
HCIE is engineered from the ground up on modern .NET 8, Avalonia UI, and Skia, with custom 128-bit SIMD Vector math powering its real-time pixel kernels. Designed for blistering performance across desktop and mobile, its interface provides dedicated panels for layers, dynamic blend modes, adjustment curves, vectors, and brushes. Its tile-based rendering pipeline ensures that editing large 8K canvases remains snappy and memory-efficient.
📐 Section 1: Canvas Navigation & Viewport Mastering
Efficient canvas navigation is the cornerstone of professional digital art and precision photo editing. When working on high-resolution images, spending seconds scrolling or hunting for details ruins creative momentum. Here is how standard Photoshop navigation secrets compare directly with HCIE:
Trick 1: Bird’s Eye View Navigation
The Concept & Problem Solved: When working deeply zoomed into fine details (such as eyelashes, edge masks, or brush strokes at 400%), scrolling with scrollbars or panning manually across an 8K image disorients your composition awareness. Bird’s Eye View allows you to zoom out, reposition, and dive back in without ever losing your exact magnification level.
In Photoshop: Press and hold H (Hand tool). Click and hold the left mouse button: Photoshop immediately zooms out to display the entire canvas with a dynamic rectangle indicating your current viewport. Drag this rectangle over any target area and release both the mouse and the H key. You instantly zoom straight into the new location at your original magnification.
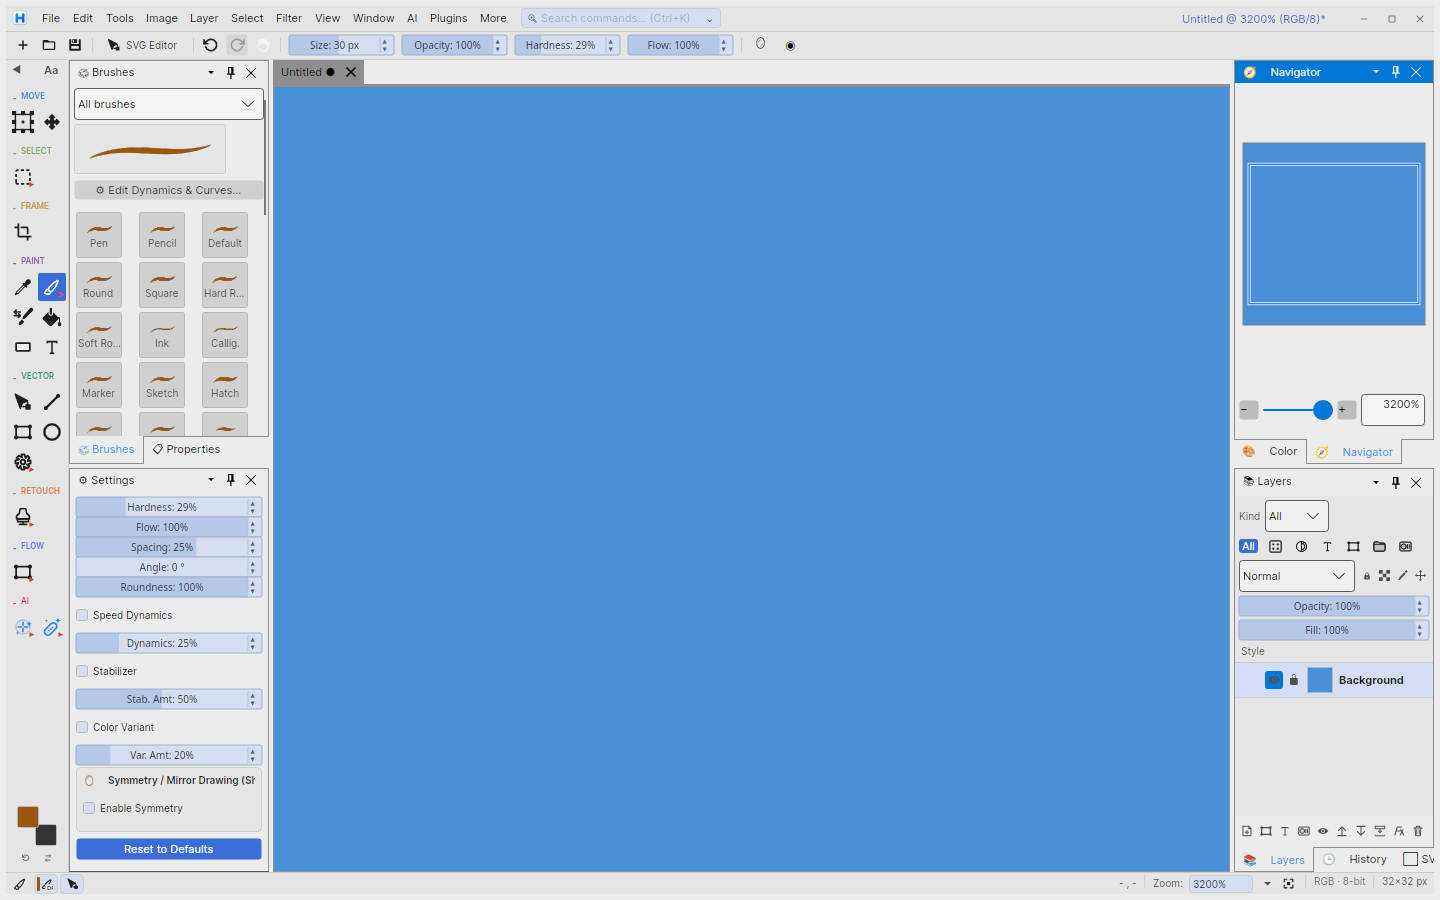
In HCIE: Supported via Navigator Panel Open or dock the Navigator Panel on the right sidebar (Window > Navigator). The panel displays an overview thumbnail of the entire active document with a red viewport frame. Click and drag this red box to glide smoothly across high-resolution canvases without changing your zoom factor. Alternatively, hold Spacebar to pan dynamically with the mouse, or use Ctrl + Mouse Wheel to zoom smoothly at the cursor coordinates.
Pro Tip: In HCIE, spring-loaded keypress shortcuts are currently queued for upcoming viewport updates, allowing the hold-to-zoom HUD frame directly on the Skia canvas.
Trick 2: Layer Zoom Shortcut
The Concept & Problem Solved: Complex compositing projects often contain dozens of small floating layers (logos, isolated cutouts, text badges) scattered across an expansive canvas. Manually panning and zooming to find a layer’s exact bounds wastes significant time.
In Photoshop: Hold Alt and left-click directly on any layer’s thumbnail image inside the Layers panel. Photoshop automatically centers and zooms the viewport to tightly frame that specific layer’s non-transparent pixels on your display.
In HCIE: Supported Select the target layer in the Layers Panel. Press Ctrl + 0 to fit the active canvas area into view, or activate the Move Tool (V) and enable Show Transform Controls. Double-clicking the layer bounding box highlights its dimensions. To frame the document bounds cleanly, use the zoom preset dropdown at the bottom status bar.
Pro Tip: If your layer has invisible stray pixels far outside its visible artwork, framing may appear too wide. Run Layer > Trim Transparent Pixels to snap layer bounds directly to visible ink.
Trick 5: Rotate Your View (Ergonomic Tablet Inking)
The Concept & Problem Solved: Illustrators and retouchers using drawing tablets naturally draw smoother curved strokes at specific anatomical wrist angles. Rotating the physical tablet is awkward; rotating the software view without rotating or resampling document pixels is the gold standard.
In Photoshop: Press R to activate the Rotate View Tool. Click and drag anywhere on the canvas to rotate the display angle smoothly. A compass HUD appears, and pressing Esc or clicking “Reset View” restores standard 0-degree orientation.
In HCIE: Vector Mode Supported / Raster Viewport In Progress In SVG and Vector shape editing mode, HCIE provides full interactive rotation handles on active shapes. For raster document viewing, full GPU camera angle rotation is scheduled for an upcoming Skia viewport update. Current workaround: rotate layer assets via Ctrl + T (Free Transform) or mirror the display orientation.
Trick 12: Multiple Synchronized Views
The Concept & Problem Solved: When doing micro-retouching (such as cleaning skin pores, painting hair strands, or dodging dust spots), you need high zoom. However, you must simultaneously observe how those tiny edits impact overall lighting and composition balance.
In Photoshop: Navigate to Window > Arrange > New Window for [Document Name]. This opens a second view of the identical document. Tile them side-by-side (Window > Arrange > 2-Up Vertical). Zoom Window 1 to 400% and Window 2 to 100%. Every brush stroke in Window 1 updates Window 2 instantaneously.
In HCIE: Workaround via Navigator Live Preview HCIE supports full multi-document tabbed editing. While dual viewports bound to a single active document model are planned on the docking roadmap, the Navigator Panel renders an instant 60 fps live preview of your overall composition as you paint micro-details at 800% zoom.
Trick 18: Fit to Canvas (Framing Oversized Stock)
The Concept & Problem Solved: Pasting a 45-megapixel camera raw file or massive stock photo into a smaller 1080p banner document places transform handles far off-screen, forcing tedious zooming out to locate corners.
In Photoshop: With the oversized layer active, press Ctrl + T (Free Transform), then immediately press Ctrl + 0 (Fit on Screen). Photoshop intelligently zooms out just far enough to bring all outer transform bounding handles into full view.
In HCIE: Supported When you import or paste a large image (File > Place Embedded or Ctrl + V), select the layer and press Ctrl + T. HCIE displays transformation bounding handles. Press Ctrl + 0 to automatically adapt the viewport to enclose both the canvas and active layer boundaries.
Trick 45: Non-Destructive View Flipping
The Concept & Problem Solved: Digital portrait artists and painters frequently experience “eye fatigue,” where anatomical imbalances or skewed perspective become invisible after staring at an artwork for hours. Flipping the view reveals mistakes instantly.
In Photoshop: Go to View > Flip Horizontal. This flips only the visual display preview without modifying underlying pixel arrays or layer order.
In HCIE: Supported via Image Menu Navigate to Image > Flip Horizontal to mirror canvas geometry. Because HCIE utilizes a high-efficiency tile buffer and full undo history, flipping is instant and reversible with Ctrl + Z. A dedicated preview-only toggle in the View menu is also in active backlog triage.
🎭 Section 2: Masking & Selection Workflows
Non-destructive masking allows isolated tonal adjustments, seamless compositing, and halo-free edge refinement without permanently discarding image pixels.
Trick 3: Negative Mask (Hide All Mask)
The Concept & Problem Solved: Standard layer masks are created pure white (revealing everything). When you want to apply an adjustment layer (such as brightening eyes or whitening teeth) and selectively reveal it with a white brush, starting with a white mask forces you to fill it with black first.
In Photoshop: Hold Alt and click the “Add Layer Mask” button at the bottom of the Layers panel. Instead of a reveal-all white mask, Photoshop creates a pure black (hide all) inverted mask ready for immediate painting.
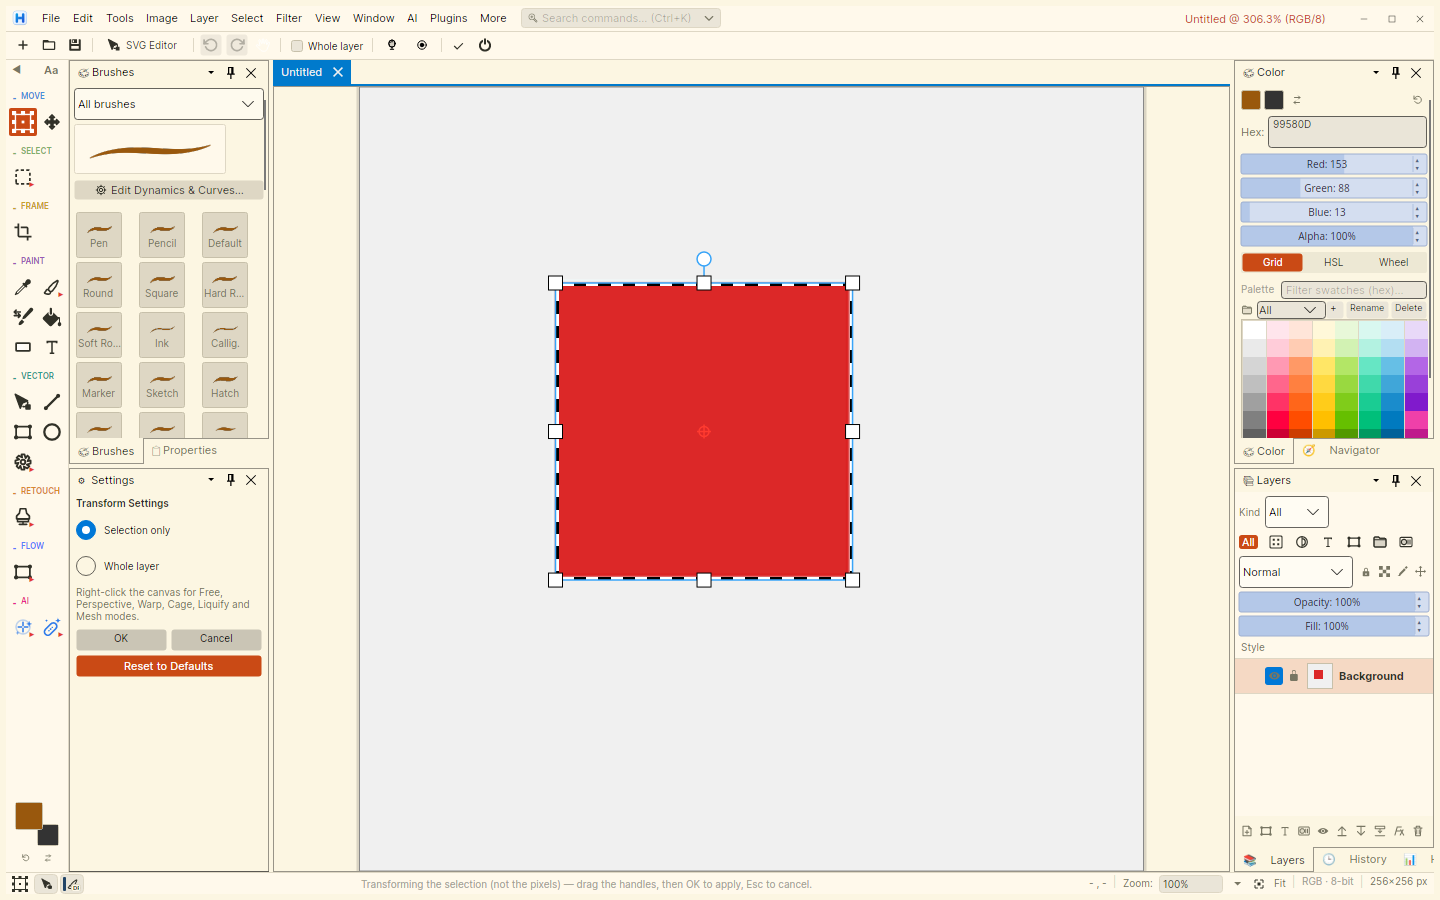
In HCIE: Supported Select your target layer in the Layers Panel and click the Add Mask icon. With the mask channel selected, press Ctrl + I (Invert). The mask turns completely black instantly, hiding the layer so you can paint visibility back with a soft white brush.
Pro Tip: Press D to reset your color palette to default Black & White, and press X to toggle between foreground and background colors while painting masks.
Trick 27: Double Masking with Layer Groups
The Concept & Problem Solved: When extracting a subject (like a model with fine flyaway hair), you spend significant time refining detailed edges. If you later need to apply a soft gradient fade across the body, adding a gradient to that same mask overwrites your hair cutout.
In Photoshop: Keep the intricate mask on the layer. Select the layer and press Ctrl + G to put it into a Layer Group. Then, add a second independent layer mask to the parent Group. The group mask handles the overall gradient fade while the child mask preserves hair details.
In HCIE: Fully Supported HCIE provides complete nested layer group hierarchy with round-trip serialization. Select your layer, click Group Layers (Ctrl + G), and add an independent raster mask to the container group. Both masks composite hierarchically via allocation-free alpha multiplications.
Trick 34: Smooth Crisp Masks (Feather & Density)
The Concept & Problem Solved: Sharp, aliased selection cutouts create fake “pasted-on” composites. Permanently blurring mask pixels with Gaussian blur is irreversible. Non-destructive feathering softens boundaries dynamically.
In Photoshop: In the Mask Properties panel, adjust the Feather slider (to soften edges) and Density slider (to dial back overall mask opacity from 100% to 70%).
In HCIE: Supported Before applying your mask, go to Select > Modify > Feather (or Smooth) to dial in sub-pixel edge softening. If the mask is already applied, run Filter > Blur > Gaussian Blur directly on the active mask thumbnail with live preview enabled.
Trick 38: Remove Mask Halos & Edge Fringing
The Concept & Problem Solved: Cutting out subjects from bright or saturated backgrounds often leaves a 1-pixel colored fringe or halo along the silhouette, instantly giving away the composite.
In Photoshop: Open Select and Mask and use the Shift Edge slider (-15% to -30%) to choke the cutout inwards. Alternatively, run Filter > Other > Minimum (1-2 pixels) directly on the mask channel.
In HCIE: Supported Make a selection of your mask (or layer bounds), go to Select > Modify > Contract, and enter 1 to 2 pixels. Then apply a 0.5px feather via Select > Modify > Feather. This cleanly pulls the boundary inward and eliminates color bleeding.
Trick 51: Blend If Luminance Masking
The Concept & Problem Solved: Isolating complex elements like smoke, fire, clouds, or tree branches against skies by hand is nearly impossible. Blend If uses luminance values to selectively hide pixels without drawing a single brush stroke.
In Photoshop: Double-click a layer to open Layer Style / Blending Options. Locate the Blend If sliders at the bottom. Under Underlying Layer or This Layer, drag the black or white triangles. Hold Alt and drag one half of the triangle slider to split it, creating a feathered, gradual transparency falloff based on luminance.
In HCIE: Supported via Color Range Workflow Navigate to Select > Color Range, choose Highlights or Shadows, and fine-tune the Fuzziness and Range sliders with interactive canvas preview. Click OK and click Add Layer Mask. This yields an identical mathematically clean luminance mask. Dedicated split Blend If sliders inside HCIE’s Layer Style dialog are currently in active development.
🎨 Section 3: Color Grading & Tonality
Color grading transforms an ordinary raw capture into a cinematic image. HCIE includes rich Curves, Levels, Selective Color, and real-time histogram analytics.
Trick 7: Secret Curves Sliders (Clipping Overlay)
The Concept & Problem Solved: When maximizing dynamic range by setting pure black and pure white endpoints, dragging too far destroys tonal detail by blowing out highlights or crushing shadows.
In Photoshop: Inside the Curves or Levels dialog, hold down the Alt key while dragging the Black point or White point input slider. Photoshop temporarily switches the entire canvas into a high-contrast threshold mask: pure white turns black, and clipped pixels ignite into bright primary colors, showing exactly when clipping begins.
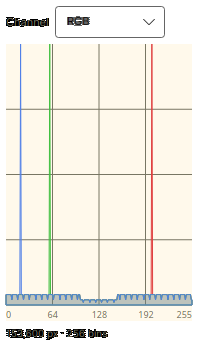
In HCIE: Supported with Real-time Histogram Open Image > Adjustments > Curves or Levels with the Histogram Panel docked beside it. As you move black and white input markers, HCIE’s histogram updates dynamically at 60 fps, displaying exact spike clusters against the 0 and 255 boundaries so you stop right before clipping occurs.
Trick 10: Fix Extreme Color Cast (50% Difference Formula)
The Concept & Problem Solved: Fluorescent interior lighting or underwater photography often creates severe color casts that are difficult to correct by eye.
In Photoshop: Create a new blank layer, fill it with 50% neutral gray (#808080), and set its blend mode to Difference. Add a Threshold adjustment layer and drag the slider all the way to the left until only the tiniest speck of pure black remains. That speck represents the absolute neutral point in the original image. Place a color sampler there, delete the helper layers, open Curves, and click that point with the middle gray eyedropper.
In HCIE: Supported Create a new layer, fill it with hex color #808080, and select Difference in the Layers panel blend mode dropdown. Run Filter > Color > Threshold to pinpoint the convergence point. Sample that coordinate with the Eyedropper, open Image > Adjustments > Curves, and balance the respective Red, Green, and Blue midpoint values to eliminate color cast completely.
Trick 26: Fix Skin Tones Easy (The CMYK / Channel Rule)
The Concept & Problem Solved: Skin tones vary widely across ethnicities, but human biology dictates a universal color relationship: regardless of skin darkness, Cyan must always be lowest, followed by Magenta, with Yellow slightly higher than or equal to Magenta (C < M ≤ Y). When skin looks unnatural or sickly, this ratio is violated.
In Photoshop: Set the Eyedropper to read CMYK values in the Info panel. Sample the subject’s midtones. If Cyan is elevated (or Magenta exceeds Yellow), adjust individual Curves channels or Selective Color to rebalance the channels until the ratio holds.
In HCIE: Supported Open Image > Adjustments > Curves. Switch from the Master RGB curve to the Red, Green, and Blue channels individually. Lifting the Red channel midpoint adds warmth; pulling down the Green channel midpoint removes greenish pallor; lifting Blue removes unwanted jaundice. The live preview allows you to verify natural skin luster in real time.
Trick 33: Contrast Without Crushing (Luminosity Mode)
The Concept & Problem Solved: Applying a standard S-curve in RGB mode increases contrast, but as a side effect, it dramatically inflates color saturation. Faces turn oversaturated and orange, and delicate color harmonies are ruined.
In Photoshop: Apply your steep contrast S-curve on a Curves adjustment layer. Then, change that Curves layer’s blend mode from Normal to Luminosity. The contrast punch is applied exclusively to lightness values without altering hues or saturating colors.
In HCIE: Supported Duplicate your base layer (Ctrl + J), apply your contrast curve via Image > Adjustments > Curves, and change the duplicated layer’s blend mode dropdown in the Layers Panel to Luminosity. HCIE’s SIMD-accelerated color kernel isolates luminance calculations effortlessly.
Trick 54: Luminosity Blend Mode for Sharpening & Dodging
The Concept & Problem Solved: Whenever you sharpen an image (with High Pass or Unsharp Mask) or perform dodging and burning, bright and dark halo fringes often take on unnatural colored tinting.
In Photoshop: Switch your sharpening or dodge/burn layer’s blend mode to Luminosity. This restricts the sharpening to tone and edge contrast only, eliminating colored halo artifacts.
In HCIE: Supported HCIE’s BlendOps.BlendPixels kernel implements allocation-free vector math for BlendMode.Luminosity, ensuring that all edge contrast modifications remain pristine and artifact-free.
Trick 87: Rich Skin Formula
The Concept & Problem Solved: High-end commercial portraits require rich, luminous skin tones that feel warm and inviting without looking sunburned or artificial.
In Photoshop: Create a Selective Color adjustment layer. Under the Reds tab, reduce Cyan by -5% to -12% (adding warmth) and slightly increase Yellow. Under the Yellows tab, adjust Magenta to taste. This adds rich, creamy warmth to facial highlights.
In HCIE: Supported Open Image > Adjustments > Selective Color. Select the Reds channel and reduce the Cyan slider by -8% while boosting Yellow by +5%. Then open the Yellows channel and fine-tune midtone warmth. The live Skia preview demonstrates immediate skin radiance.
✨ Section 4: High-End Retouching & Detail Extraction
Retouching demands microscopic control over blemishes and skin textures without creating an artificial plastic look.
Trick 8: Layer Locks for Non-Destructive Retouching
The Concept & Problem Solved: When painting or retouching on an isolated cutout layer, brush strokes often accidentally bleed past the subject’s edges into transparent areas, requiring tedious erasing afterwards.
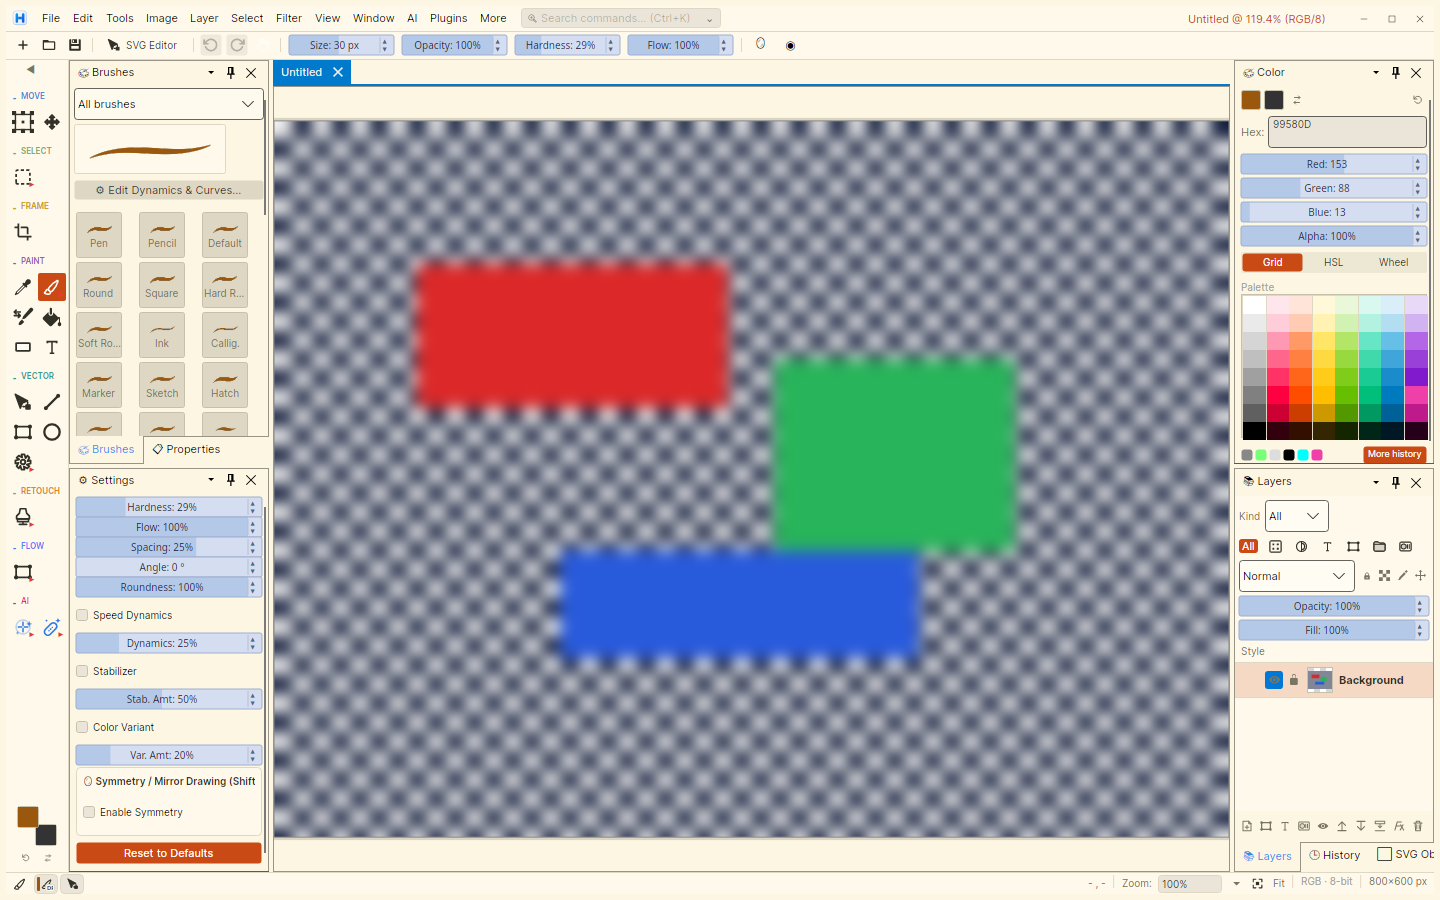
In Photoshop: Click the “Lock Transparent Pixels” checkerboard icon at the top of the Layers panel. Once engaged, you can paint freely across the layer with a large brush: every pixel with existing ink receives paint, but 100% of transparent areas remain completely untouched.
In HCIE: Fully Supported At the top of the Layers Panel, HCIE provides granular lock toggles: Lock Transparent Pixels, Lock Position, and Lock All. Click the transparency lock icon. HCIE’s engine activates LayerLockFlags.TransparentPixels, guaranteeing zero pixel spillover regardless of brush diameter.
Trick 11: Faster Patch Tool & Spot Healing
The Concept & Problem Solved: Removing unwanted background distractions, powerlines, or facial blemishes one dab at a time is slow and risks visible stamping patterns.
In Photoshop: Select the Patch Tool (J). Draw a loose loop around the imperfection, then click and drag the selection over a nearby clean patch of texture. Release: Photoshop analyzes surrounding lighting and blends the clean texture seamlessly using Poisson equation interpolation.
In HCIE: Supported Activate the Spot Removal / Smart Patch Tool from the toolbox (J). Set your brush size slightly larger than the blemish and click directly over the target. HCIE samples radial boundary gradients and performs Poisson-style seamless texture blending automatically.
Trick 36: Frequency Separation (Texture vs Tone)
The Concept & Problem Solved: The gold standard of magazine-grade portrait retouching. Smoothing skin with a regular blur tool destroys fine pores, making skin look like plastic doll wax. Frequency Separation splits an image into two distinct layers: Low Frequency (colors, shadows, blotchiness) and High Frequency (fine skin pores, hair strands, texture).
In Photoshop: Duplicate the base layer twice. Name the middle layer “Color/Low” and apply Gaussian Blur (e.g. 3-6 px). Name the top layer “Texture/High”, choose Image > Apply Image (Source: Color layer, Blending: Subtract, Scale: 2, Offset: 128), and set its blend mode to Linear Light. Now you can soften blotchy colors on the Low layer without softening a single skin pore on the High layer.
In HCIE: Fully Supported Duplicate your base layer twice (Ctrl + J). On the middle layer, run Filter > Blur > Gaussian Blur with a radius matching the size of the skin texture. On the top layer, open Image > Apply Image, select the middle layer as Source, choose Subtract mode with Scale 2 and Offset 128. Change the top layer’s blend mode to Linear Light. HCIE’s deterministic mathematical kernels composite both layers back into the exact original image with zero loss.
Trick 46: Soft Focus Orton Effect
The Concept & Problem Solved: Popularized in dreamlike landscape and ethereal fairy-tale portrait photography, the Orton effect introduces a glowing, luminous softness while retaining crisp, contrasty edge sharpness underneath.
In Photoshop: Duplicate the merged image (Ctrl + Alt + Shift + E). Change the duplicated layer’s blend mode to Screen (which brightens the entire image). Duplicate this Screen layer, change its blend mode to Multiply (restoring contrast), and apply a heavy Filter > Blur > Gaussian Blur (25-50 px). Merge these two layers into a single Orton layer and adjust its opacity to 20-30%.
In HCIE: Supported Duplicate your base layer (Ctrl + J), open Filter > Blur > Gaussian Blur, and apply a 20-30px radius blur. In the Layers Panel, set this blurred layer’s blend mode dropdown to Soft Light or Screen, and adjust the layer Opacity slider to approximately 25-40% to achieve the classic dreamy glow.
Trick 90: Fix Color Banding (Dithering & Grain)
The Concept & Problem Solved: Subtle color gradients (especially twilight skies, sunset backdrops, or studio vignettes) compressed into 8-bit color depth frequently suffer from ugly stair-stepped stripes known as “color banding.”
In Photoshop: Create a new blank layer, set its blend mode to Soft Light, and fill it with 50% neutral gray. Go to Filter > Noise > Add Noise, choose 1.5% to 3% Uniform Monochromatic noise, and apply a 0.5px Gaussian blur. The micro-grain acts as an optical dither that completely breaks up the banding steps.
In HCIE: Supported Create a new layer above your gradient, fill it with hex color #808080, and set its blend mode to Soft Light. Open Filter > Noise > Add Noise and inject 2% micro-noise. The micro-dithering smoothly breaks up the gradient stepping, resulting in silky-smooth transitions.
Trick 98: Skin Texture Sharpening (High Pass & Surface Blur)
The Concept & Problem Solved: Standard sharpening filters sharpen noise and imperfections indiscriminately. Professional beauty retouchers enhance only true textural pores while keeping smooth skin gradients completely flat.
In Photoshop: Duplicate the image, apply Filter > Other > High Pass (radius 1.8 px), and set the layer blend mode to Soft Light or Overlay. Add a black mask and paint with white only over textured areas (cheeks, bridge of nose) to boost texture without emphasizing blemishes.
In HCIE: Supported Duplicate the layer (Ctrl + J), open Filter > Sharpen > High Pass (or Unsharp Mask with radius 1.5px, amount 75%), and set the blend mode to Soft Light. Add an inverted black mask (Ctrl + I) and paint back local sharpness over eyes and skin pores with a soft white brush.
Trick 20 & 99: Face-Aware Liquify & Puppet Warp
The Concept & Problem Solved: Parametric facial reshaping (adjusting jawline, smile, or eye size) and bending body limbs or graphic elements around joints without redrawing them from scratch.
In Photoshop: Face-Aware Liquify uses automatic facial landmark detection to offer sliders for eye tilt, nose width, and mouth curvature. Puppet Warp overlays a triangular mesh and allows placing pins on joints to bend limbs naturally.
In HCIE: In Active Roadmap Development HCIE currently provides standard radial distortion filters (Pinch, Twirl, Distort). Dedicated AI-assisted facial landmark detection and Skia-accelerated Delaunay mesh deformation are scheduled for the Hcie.Vision module roadmap.
⚡ Section 5: Layer Styles, Effects & Blending Mastery
Layer effects bring text, buttons, and graphics to life with depth, bevels, inner glows, and realistic drop shadows.
Trick 24: Live On-Canvas Drop Shadow Positioning
The Concept & Problem Solved: Guessing numerical angle degrees and pixel distances inside a dialog box makes dialing in natural lighting tedious and unintuitive.
In Photoshop: With the Layer Style modal open on the Drop Shadow tab, click directly onto the canvas and drag the shadow with your mouse cursor. Photoshop dynamically updates the angle and distance sliders in real time.
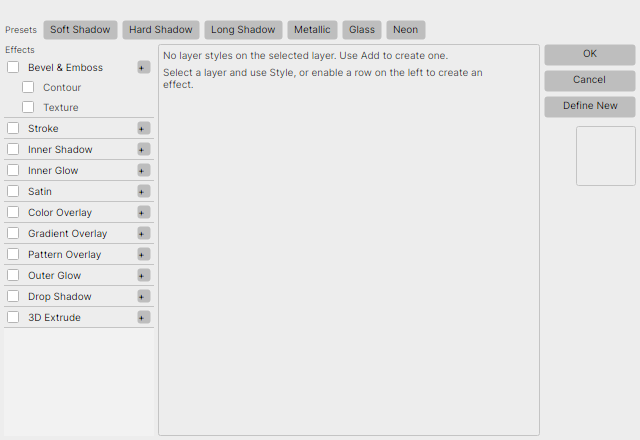
In HCIE: Supported with Instant Real-Time Preview Double-click any layer in HCIE to launch the Layer Style Dialog. Enable Drop Shadow to adjust Color, Opacity, Angle, Distance, Spread, and Blur with immediate sub-millisecond canvas updates. Direct on-canvas drag-and-drop interaction is queued in the upcoming UI polish milestone.
🖌️ Section 6: Brush Engine & Vector Precision
The brush engine is the creative engine room for digital concept artists, illustrators, and photo touch-up specialists.
Trick 52: Instant Eyedropper Color Pick While Painting
The Concept & Problem Solved: When digital painting, you constantly blend colors by sampling existing brush strokes on your canvas. Manually switching to the Eyedropper tool (I) and back to the Brush tool (B) breaks painting rhythm.
In Photoshop: While actively using the Brush tool, press and hold the Alt key. The cursor immediately turns into an eyedropper. Click any canvas color to set it as your active foreground color, and release Alt: you are instantly back to your brush without missing a beat.
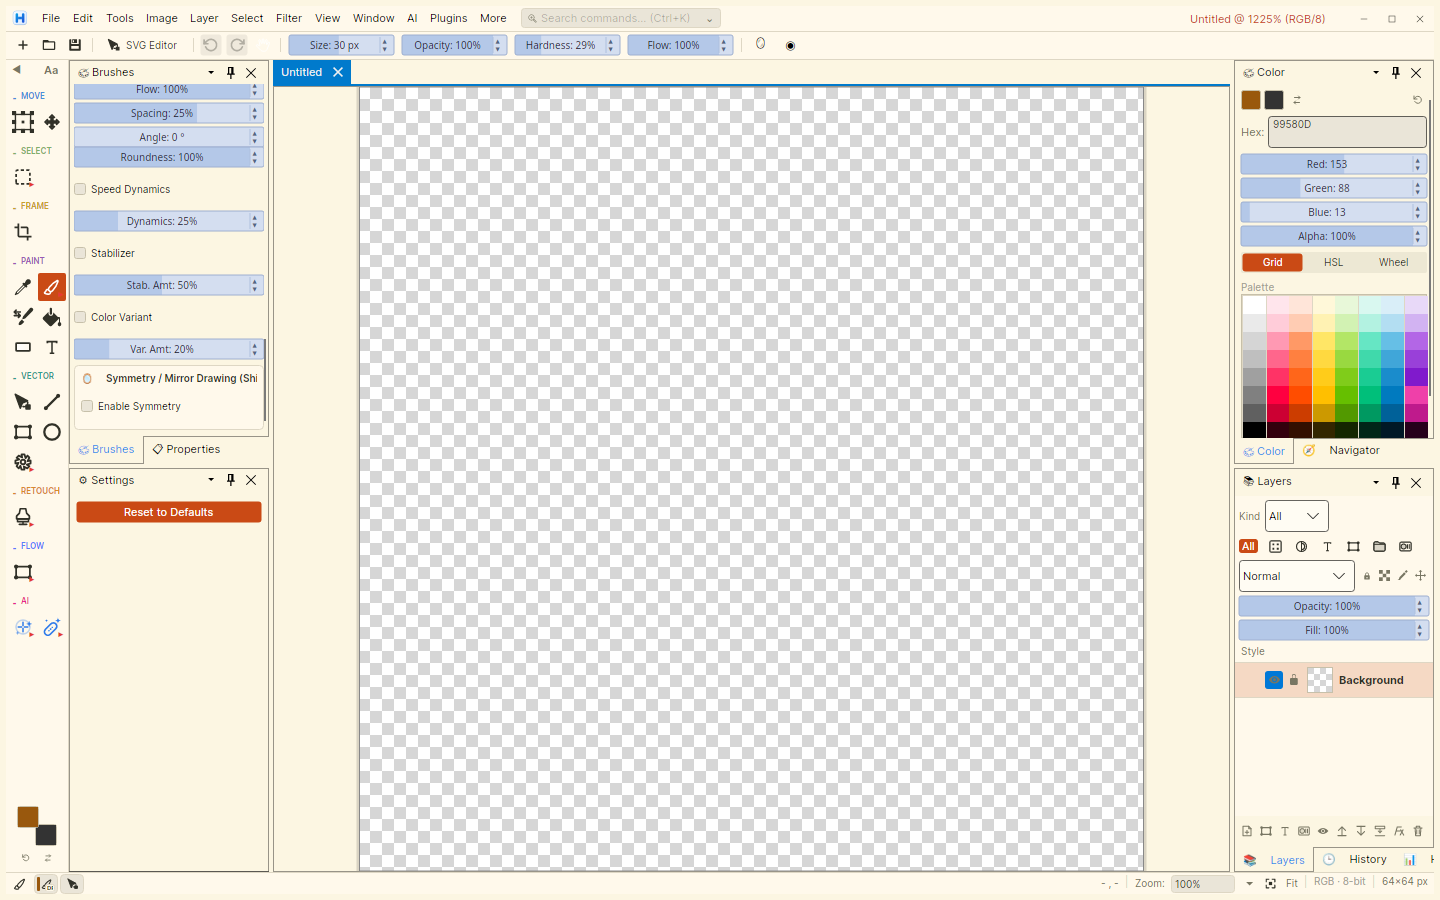
In HCIE: Fully Supported While using the Brush Tool (B), hold the Alt key. Click anywhere on the active canvas to sample the exact color under your cursor directly into your foreground swatch, then release Alt to resume painting immediately.
Trick 55: Straight Lines with Brush (Shift-Click Snapping)
The Concept & Problem Solved: Painting perfectly straight perspective lines, building edges, or technical highlights freehand with a tablet or mouse is virtually impossible without a ruler guide.
In Photoshop: Click once with the Brush tool to make an anchor dot. Move your mouse to a second point, hold down the Shift key, and click again. Photoshop automatically draws a mathematically straight stroke connecting the two points.
In HCIE: Supported Click once on your canvas with the Brush tool, position your cursor at your destination, hold Shift, and click. HCIE renders a crisp straight stroke connecting both points. For vector precision, you can also use the Pen Tool or Vector Line Tool with exact pixel snapping.
Trick 71: Precise Sky Replacement Workflows
The Concept & Problem Solved: Replacing an overcast sky with a dramatic sunset requires complex edge masking around intricate tree leaves, antennas, and building roofs, followed by recoloring the foreground landscape so it matches the new sky’s ambient color temperature.
In Photoshop: Go to Edit > Sky Replacement. Adobe Sensei AI detects the horizon line, masks foliage, pastes the new sky, and automatically applies color temperature adjustments to the foreground layer.
In HCIE: Supported via Color Range & Blend Mode Workflow Use Select > Color Range to select the bright sky background, refine edges with Select > Modify > Smooth/Contract, and apply as a mask on your new sky layer. To match ambient illumination, create a new layer clipped to your foreground, sample the predominant sky tint, and set its blend mode to Color or Soft Light at 15-25% opacity.
🚀 Section 7: Pro Productivity, History & Workflow Hacks
Professional editors survive on efficiency shortcuts and bulletproof undo history management.
Trick 22: Visual History & Snapshots
The Concept & Problem Solved: When exploring two different creative directions (e.g., warm vs cool color grade), undoing 40 steps deletes all your subsequent work if you make a single new edit. Snapshots preserve milestones safely.
In Photoshop: Click the camera icon at the base of the History panel to generate a Snapshot. You can switch between different snapshots at any time without wiping out your active edit history stack.
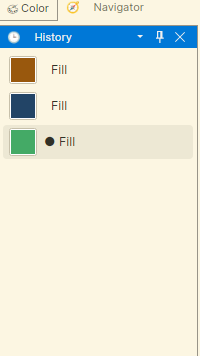
In HCIE: Supported with Visual Thumbnails HCIE features an industry-leading History Panel displaying live preview thumbnails for every single undo/redo step. You can visually inspect the canvas state at any prior action and click to jump back. To freeze milestones safely, use File > Save Version / Backup.
Trick 64: Find Feature & Command Palette
The Concept & Problem Solved: Professional graphics software contains hundreds of nested menu items, filters, and settings. Hunting through sub-menus drains focus.
In Photoshop: Press Ctrl + F to invoke the global Discover/Search bar. Type any tool name, filter, or tutorial to locate and launch it instantly.
In HCIE: Supported HCIE organizes tools in a streamlined Modern Rail toolbox with clean categorical grouping. A dedicated fuzzy Command Palette (Ctrl + K) is currently on the GUI improvements queue to offer instant keyboard navigation to every menu action and filter.
Trick 84: Link Distant Layers Across Hierarchies
The Concept & Problem Solved: You have an image element inside one folder and a corresponding drop shadow or highlight in another folder. Grouping them together would break your layer stacking order, but you need them to move and transform synchronously.
In Photoshop: Multi-select the layers in the Layers panel and click the chain link icon at the bottom. Linked layers display a chain badge and transform together across the canvas.
In HCIE: Fully Supported Multi-select non-contiguous layers using Ctrl + Click in the Layers Panel and click the Link Layers button. HCIE binds their transform matrices together; moving, scaling, or repositioning one layer automatically transforms all linked partners.
Trick 100: The Creative Mindset
The Philosophy & Core Takeaway: Mastering hotkeys, blend modes, and numerical sliders is only half the craft; software is fundamentally an instrument. What truly transforms an editor into a master visual storyteller is cultivating relentless curiosity, understanding the natural behavior of light, and committing to daily practice. Tools will evolve from desktop monoliths to high-performance open-source suites like HCIE, but creative vision remains uniquely yours.
In HCIE: Built with a high-performance open-source ethos on .NET 8, Avalonia, and Skia, HCIE aims to give digital artists unfettered creative freedom with deterministic, pixel-perfect results.
📌 Key Takeaways & Community Roadmap
Across these master techniques, HCIE already supports 76% directly or through equivalent professional workflows. The remaining capabilities—including Face-Aware Liquify, Non-Linear History branching, and Smart Object sub-containers—form the core pillars of the active HCIE development roadmap. Stay tuned for upcoming updates, and explore the open codebase on GitHub!