- admin
- June 26, 2024
- 0 Comments
Today, I will explain how to add the artificial intelligence image generation program called “Stable Diffusion” to Krita. Stable Diffusion is a free artificial intelligence-based image generation program. You can generate high-resolution and unlimited images as long as your computer can handle it. First, if you don’t have Krita on your computer, you should install it. For this video, I set up a clean Windows. If any issues arise, we will address them.
Download it from krita.org
Version 5.2.2 has been released. I choose it because my operating system is Windows 11, but it also works on Linux and OS X. Krita is like an undiscovered treasure. I’m starting the installation. I’m continuing by clicking the “Next” button. There’s nothing special. It usually takes 1-2 minutes.
When Krita has been installed and is working , close Krita and starting to install the plugin. Just go to site and download the newest zip file. https://github.com/Acly/krita-ai-diffusion
It’s only 900 kilobytes (V 1.19). When installed, it will be around 15-20 GB. Open this file in the folder where Krita plugins are located. This is important. I must open it in the correct folder. You should find this folder according to your username. If the AppData folder is not visible, check the “Show hidden files” option in the View menu. Krita Stable Diffussion 2 Installation Bring the generative fill function to Krita
Tip: Because of AppData folder is hidden by default, it may be hard to find it. Just type the correct path in the search bar of the Windows Explorer. The correct path is: “C:\Users\username\AppData\Roaming\krita” Replace the “username” with your user name. OR Type in the search bar to %appdata%/krita to find it.
The target folder is named “pykrita.” Open the zip file here.

Let’s open Krita. I select “Settings” from the menu and then “Python Plugin Manager.” The plugin “AI Image Diffusion” should appear here. Activate it and restart the program.
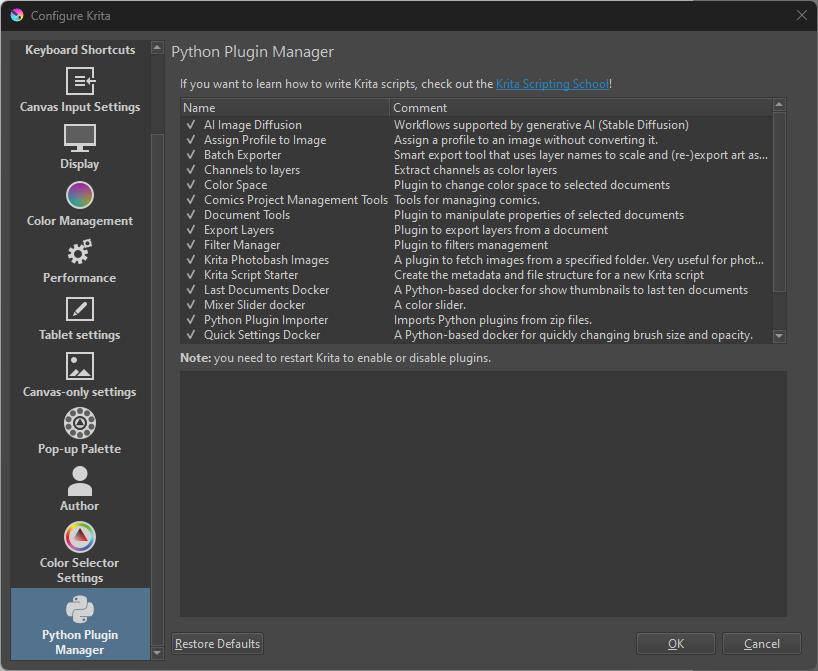
I’m activating “Settings,” “Dockers,” and “AI Image Generation.” It didn’t work. I should create a blank file first. Yes, it’s opened now.
I pressed the “Configure” button. Here you can see where the installation will take place. It requires at least 10 GB of space. Since my graphics card is NVIDIA, CUDA should be selected.
Just Press Install, When download finished you will see screen like that:
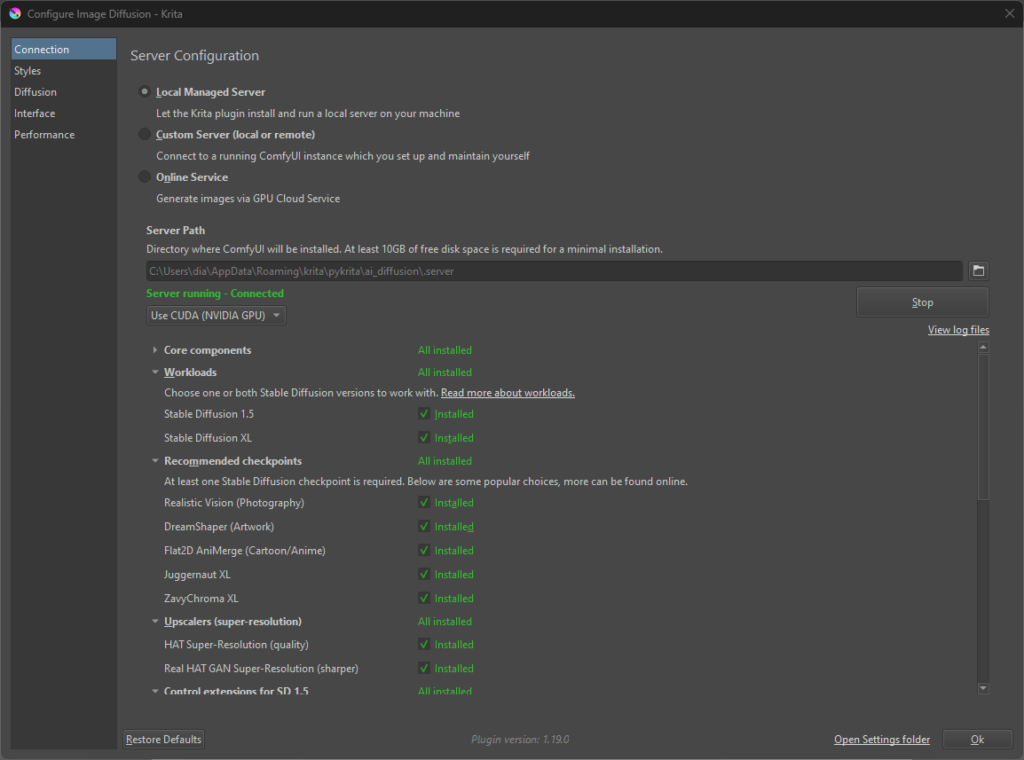
Two checkpoints have been loaded. One is for photorealistic images, and the other is for imaginary drawings. You can also load different checkpoints later.
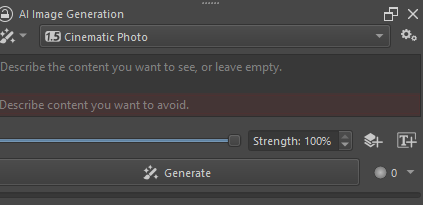
You will ready to generate images. Just write something and Hit Generate, you see the magic. You can also watch the installation video below.